
The Sequences View displays added sequences and aligned sequences. Sequence names selected in this view are simultaneously selected all other views in MegAlign Pro. Similarly, sequence names selected elsewhere will be highlighted in the Sequences View.
To access the view, click on the Sequences tab or choose View > Sequences > Show.

By default, the Sequences view consists of three sections: the header, the footer, and sequences area, the last of which consists of nucleotide or amino acid codes for each sequence on the right, and their labels on the left. Each section can display a variety of optional data tracks. The Sequences view has a different appearance depending on the zoom level.
When viewing a multi-block alignment produced by Mauve and using a minimal horizontal zoom, the currently-selected alignment block will appear the same color as in the Overview. Flanking sequences in adjacent blocks will appear gray. At higher zoom levels, the residues for the active block will be shown in bright colors, while flanking sequence residues are represented by “dimmed” (dull) colors.
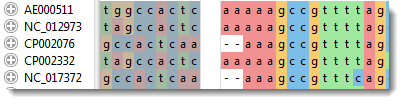
The dimmed residues are displayed as unaligned sequences, and therefore appear ungapped and without a consensus. To view the dimmed residues as aligned sequences, select the corresponding block in the Overview.
Information bar:
The blue/gray bar at the top of the view shows information pertaining to the current selection.
| Selection | Example | Information displayed |
|---|---|---|
| Nothing, and sequences have not been aligned | (blank) | (blank) |
| Nothing, and at least some sequences have been aligned |  |
The name of the alignment. |
| One sequence |  |
The sequence name and its length in bp. |
| Multiple sequences |   |
The number of sequences selected, the total number of sequences, and the alignment status. |
| A feature or any portion of one sequence |  |
The sequence name and selected range. |
| A portion of multiple sequences (selected in the Sequences view) |  |
The selected range and length in bp. |
Tasks pertaining to the Sequences view:
| Task | How to… |
|---|---|
| Specify the look and colors used in the Sequences view | Use the Sequences section and Multiple Alignment section of the Style panel. Available color schemes are described here. |
| Customize the layout of the view, zoom in or split the view | See Customize the look and layout. |
| Show a specific sequence range in the view | The Overview’s “viewport indicator” highlights the portion of the sequence displayed in the Sequences view. Drag the indicator to scroll the Sequences view along the sequence. Use the zoom sliders in the Sequences view to control the width of the viewport, and thus, the amount of visible sequence. 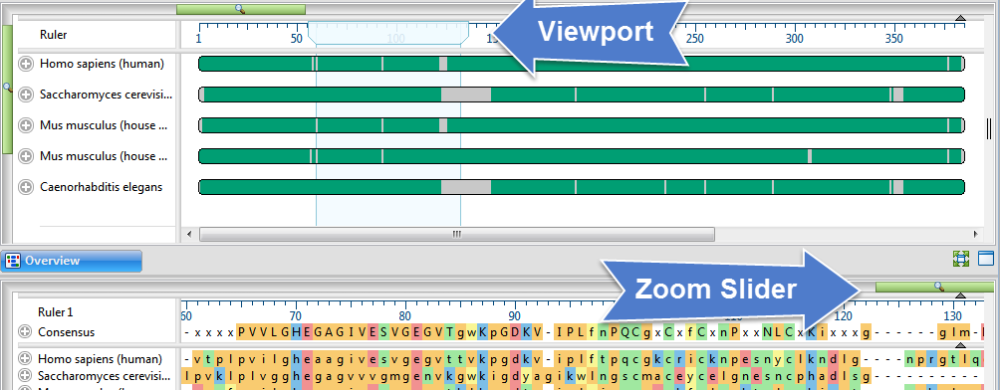 Note that if you split the Sequences view, multiple viewports will appear in the Overview. |
| Show/hide a vertical guideline | The guideline is displayed, by default, and is a navigational aid to help in guiding your eye between the sequences and the rulers. To hide the guideline in all open projects, click Sequences > Show Guideline to remove the checkmark. Even after hiding the guideline, an abbreviated version of the guideline will remain visible in the header and footer. |
| Show/hide the header, sequences area, or footer in the Sequences view | The display of the header, sequences area or footer can be toggled on/off by clicking on the small dark gray arrows near the upper right corners of each section.  |
| Search for a sequence by name | Click the Search tool ( ) on the right of the header area to open a search area. See Search for a sequence using a text query for details. ) on the right of the header area to open a search area. See Search for a sequence using a text query for details. |
| Informally compare other sequences in a non-Mauve alignment to one particular sequence | See Visually compare other sequences to one sequence. This method offers several advantages compared to using a reference (see row below): 1) If you have already computed variants, those data remain accessible; 2) sequences don’t move in the alignment. However, if there are many sequences, the comparison sequence can scroll off screen. |
| Compare other sequences in the alignment to a designated reference sequence | See Specify a reference sequence. In contrast to the “comparison” method in the row above, this offers the advantage that the comparison sequence can be seen at the same time as any other sequence in the alignment, even if there are many sequences in the alignment. In addition, you can choose to compute variants for the new reference, or leave them uncomputed. |
| Change the order of sequences in this view | Use the Sort sequences tool ( ). See Change the order of sequences. ). See Change the order of sequences. |
| Shuffle residues to the left or right of gaps | Click the Shuffle residues to the left/right of gaps tools ( |
| Export data from the view | Click the Export Data tool ( ), a shortcut to the File > Export Data subcommands. See Export data to a file. ), a shortcut to the File > Export Data subcommands. See Export data to a file. |
| Save an image of the view | Click the Export Image tool ( ), a shortcut to the File > Export Image subcommands. See Export an image of the view. ), a shortcut to the File > Export Image subcommands. See Export an image of the view. |
| Print the view | Click the Print tool ( ). See Print Images for details. ). See Print Images for details. |
Using the keyboard to move the cursor within the Sequence view:
| Task | How to |
|---|---|
| Move cursor one nucleotide or amino acid to the right/left | Select a specific base, then use the right/left arrow keys. To move a specific number of bases, type the number (e.g., 516) before using the arrow key. |
| Move cursor vertically between sequences | Select a specific base, then use the up/down arrow keys. |
| Move cursor to left end of sequence | Insert the cursor anywhere, then use the Home key. |
| Move cursor to right end of sequence | Insert the cursor anywhere, then use the End key. |
| Move the cursor horizontally left or right one screen width | Make a subsequence selection, then press the Page Up key to move left, or the Page Down key to move right. To enable this ability, the Multiple Alignment section of the Style panel must have the Layout choice set to Linear.  |
| Expand the current subsequence selection | Hold down the Shift key and then use the mouse or an available keyboard shortcut (described above in this table) to move the cursor. For example, you could select a base, then hold down the Shift key while repeatedly pressing the right arrow key (>) to expand the selection to the right of the original base. |
| Move the current subsequence selection vertically to another sequence | Make a subsequence selection, then hold down the Shift key while pressing the Page Up or Page Down keys. Note that the bases do not move from one sequence to another. Instead, the highlighted selection moves to the bases directly above or below the original selection. The selection starts at the same point on the ruler and extends for the same number of bases as in the original selection. |
Need more help with this?
Contact DNASTAR