
GenVision Pro lets you export an image of the Overview or Analysis view for use in a text editor or similar program.
- Do either of the following:
- Press the Export image tool (
![]() ) in the upper right corner of the view you want to export.
) in the upper right corner of the view you want to export.
- Use File > Export Image > Overview or File > Export Image > Analysis.
- Press the Export image tool (
 ) in the upper right corner of the view you want to export.
 - Specify the file name and choose the export format: Adobe PDF (.pdf), Microsoft PowerPoint-optimized (.pptx), PNG image (.png) or JPG image (.jpg, .jpeg).
- If you choose Adobe PDF format and a particular font is not supported there, a similar font will be substituted for the original one automatically.
- If you choose the format that is optimized for use with Microsoft PowerPoint, the GenVision Pro image is converted into an editable set of objects that can be grouped, ungrouped and moved within the target application. To constrain an object (e.g., a GenVision Pro track) within Microsoft PowerPoint to move only vertically, rather than laterally, hold down the Shift key.
- If you choose Adobe PDF format and a particular font is not supported there, a similar font will be substituted for the original one automatically.
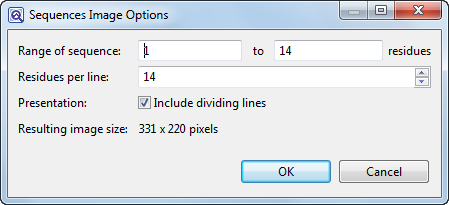
If exporting the Analysis View, the following dialog appears. If exporting the Overview, an abbreviated version appears.
- Choose export options.
- Use the Range of sequence boxes to specify the range of residues that should appear in the image. The default is the current viewport range.
- (“Analysis” only) Type in the number of Residues per line. By default, GenVision Pro places the entire range on a single line.
- (“Analysis” only) Check the Include dividing lines box if you wish to include separators between the header, sequences, and footer.
- Use the Range of sequence boxes to specify the range of residues that should appear in the image. The default is the current viewport range.
The Resulting image size updates automatically based on the options you choose.
- Click OK to export the image using the specified options or Cancel to close the dialog without exporting.
Need more help with this?
Contact DNASTAR