
This section explains how to install DNASTAR Lasergene as a network client working in tandem with a DNASTAR license server. These instructions apply to all locally-installed DNASTAR applications. Administrator privileges are required to perform this installation. If you will be installing on Macintosh, use these instructions instead.
Before starting the steps below, be sure to:
- Close all existing DNASTAR software.
- (Network client installation only) Follow all steps for the Network license server Installation on Windows or Macintosh.
To perform standalone or network client installation on Windows:
- Log in to your DNASTAR account and go to the My Account page. Press Lasergene for Windows to download the standalone installer (top image) or network client installer (bottom image).


- Double-click on the DNASTAR Lasergene Installer executable (*.exe) file to initiate installation.
- Follow the instructions in the DNASTAR Lasergene Installer screen, and then click Next.
- Read the agreement in the License Agreement screen. If you agree with the terms (required for installation), select the I accept the agreement button, and then click Next.
- In the Installation Directory screen, click Next to install in the default location (recommended). Otherwise, click on the folder icon to select a non-default location for the installation.

- In the Ready to Install screen, click Next. You will see a progress bar showing the progress of the installation.
- If a license for the current version of Lasergene is not detected, the Lasergene Authorization dialog will open.
![]()
- If you are performing a standalone installation, select Standalone and enter your Product Key. Your Product Key can be found on your My Licenses page of the DNASTAR website. (If you cannot find the key there, please contact us). Press the Authorize button. If you authorized the software using a recognized key, you will receive the following message. Press OK.
![]()
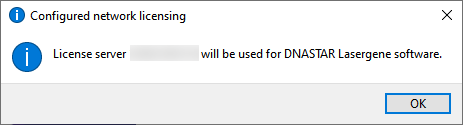
- If you are installing client software as part of a network installation, and the correct *.lshost files are in the same directory as the installer executable, you will not be prompted to license the software. Otherwise, select Network and enter the License Server’s Hostname or IP address in the text box. The IP Address can be found in the LasergeneClient’x’ folder created on the host computer’s desktop during License Server installation. Click the Authorize button. If you authorized the software using a recognized key, you will receive the following message. Press OK.
![]()
- If you do not wish to authorize at this time, press Cancel and open the authorization dialog at a later time by launching Navigator and choosing License Manager from the Utilities section.
- If you are performing a standalone installation, select Standalone and enter your Product Key. Your Product Key can be found on your My Licenses page of the DNASTAR website. (If you cannot find the key there, please contact us). Press the Authorize button. If you authorized the software using a recognized key, you will receive the following message. Press OK.


- When installation is complete, press Finish. The DNASTAR Navigator will launch automatically.
The installed Lasergene applications can now be accessed via the DNASTAR Navigator or the DNASTAR Lasergene ‘x’ folder in the Start menu.
Need more help with this?
Contact DNASTAR