
This section of the tutorial describes the procedure for working with .abi files, by far the most common file type used in this workflow. (NGS files are handled differently; please contact us for instructions.) In this section, you will use SeqMan Ultra to de novo assemble reads, then trim down to the target antibody translation sequence in the correct reading frame
- Click here to download the tutorial data. Extract it to any convenient location (e.g., your desktop).
- Launch SeqMan Ultra and click on New Sanger/ABI assembly.

- Use the Add button (image below) to add the .abi sequence reads.
- For this specific data set to assemble as a single contig, you will need to change the Minimum match percentage to 75.

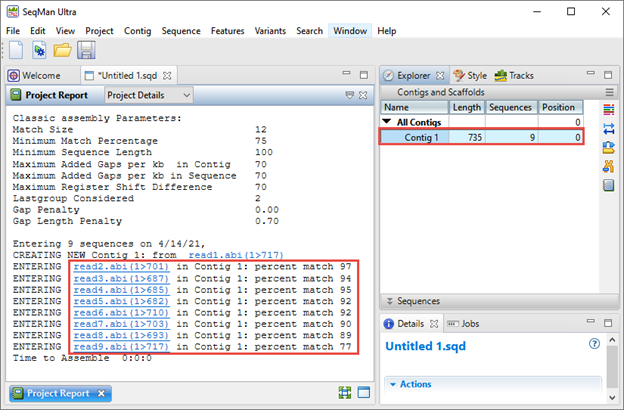
- Click the Assemble button to de novo assemble the reads.
The Explorer panel on the right (image below) shows any resulting contigs; ideally all sequences will be placed in a single contig. The Project Report view on the left shows the “percent match” statistics, which can be used to judge the quality of the assembly. Each “percent match” row corresponds with a specific well from the 96-well plate.
In the next steps, you will use SeqMan Ultra to trim down to the target antibody translation sequence in the correct reading frame.
- Double-click on the contig in the Explorer panel to open its Alignment view.
By default, variances in a germline antibody--usually from a deliberate mutation--will appear highlighted in yellow. The three highlighted areas along the sequence--two of which are shown below--denote the CDR (Complimentary Determining Region) heavy & light chains. These regions allow for different affinities for an antibody targeting a specific antigen.

In this example, the right-facing green arrows in each row denote that each read is already in the forward orientation. (Later, we’ll explain how to automatically correct any reads that happen to be in the reverse orientation).

- To display the translation track, first click on the Tracks tab in the upper right of the SeqMan Ultra window. Check the box next to Consensus translation.

By default, the Alignment view shows the Consensus translation for all three reading frames in the top strand (see middle portion of the image below).
In the next steps, you will manually trim bases to remove everything except the area between the start and stop codons of the target antibody translation sequence.
- In the Consensus translation track, look for the sequence “QVQ.” This indicates the “start” location. The nucleotide sequence corresponding to the first “Q” is “CAG.”
*Note: If you need help finding the “start” location, press the Search Alignment tool ( ) to display the Search bar. Then make the following choices and use the green arrows to locate all instances of “CAG.”

Find the instance that is associated with “QVQ” in the Consensus translation track.
- In the Consensus: Trace track at the top of the view, insert the cursor at the junction just to the left of the “C” in “CAG”. Holding down the left mouse button, drag your mouse all the way to the left and release the button. All sequence to the left of “C” is now selected.

- Press the Delete key (or right-click and choose Delete) to delete the unwanted portion of sequence.
- In the same frame where the QVQ sequence snippet is located, find the translation stop. Then trim across the coverage to remove all sequence to the right of the stop codon.
The sequences are now identical in length in the correct reading frame and are ready for export.
- Export the sequences as follows. First, use Edit > Select All to select all of the trimmed sequences. Then choose Contig > Export Subsequences.
- In the popup dialog, choose GenBank file from the second drop-down menu.
- Check Preserve aligned orientation to automatically reverse-complement reads that are in the reverse orientation. Leave everything else at the default settings and press OK.

When prompted, choose a file name and location for the exported sequences.
- Close SeqMan Ultra. There is no need to save the project.
Proceed to Part B: Translation in SeqNinja.
Need more help with this?
Contact DNASTAR