
The Surfaces section is located in the Explorer panel and is used to create molecular or solvent-accessible surfaces for selections in the Structure view.
The following video shows the Surfaces section in action:
Opening the Surfaces section:
Do any of the following:
- Click the expand bar entitled Surfaces
- Use View > Explorer > Surfaces
- Press Ctrl+Alt+S (Windows) or Option+Cmd+S
Using the Surfaces section:
Conceptually, molecular surfaces are mapped by "rolling" a spherical probe (typically the size of a water molecule) over the molecule’s surface. When a surface is applied in Protean 3D, a grid-based approach is used to calculate molecular surface coordinates that approximate the molecular surface, following the method of Xu and Zhang.
- Molecular surface (Solvent-excluded surface) – The surface coordinates display the predicted point at which water/solvent would be excluded from surface interactions.
- Solvent-accessible surface – The surface coordinates display the predicted point at which water/solvent would just be able to interact with the molecule’s surface. The volume of the Solvent-accessible surface is always greater that of the Molecular surface.
Tools in the Surfaces section:
| Tool | Name | Function |
|---|---|---|
 |
Create a surface | Creates a surface for the currently selected item(s); or for all chains, if nothing is selected. Use the associated drop-down menu to select the surface style and speed. The current default surface appears at the top of the list. Clicking the icon without using the menu will create a surface using the current default surface style and speed. To view samples of each surface style and speed, see Examples of surface types. |
 |
Delete a surface | Deletes the currently selected row and removes the surface from the Structure view. |
Tasks that can be performed within the Surfaces section:
| Task | How To |
|---|---|
| To wrap surfaces around all chains only | Double-click on the Structure view background to de-select any elements. Then click on the Create a surface tool ( ) to apply the same surface type that you last used. To choose a different surface type, instead click on the arrow to the right of the icon and choose a surface type from the resulting menu. ) to apply the same surface type that you last used. To choose a different surface type, instead click on the arrow to the right of the icon and choose a surface type from the resulting menu. |
| To wrap surfaces around a selection | Select a residue, ligand, chain, or whole structure. Then click the Create a surface tool () to apply the same surface type that you last used. To choose a different surface type, instead click on the arrow to the right of the icon and choose a surface type from the resulting menu. |
| To toggle between displaying/hiding an existing surface | Check or uncheck the box at the left of the row. |
| To toggle between displaying/hiding all surfaces | Check or uncheck the box on the left of the header row. |
| To change the color of an existing surface | By default, the color of the surface matches the color of the underlying structural component, including colors applied by the use of Color Styles in the Color section. To change the color of the surface (and its underlying structure), click on the surface to select it, then change its Fill color in the Color section. |
| To lock the color of an existing surface | When you change Color Styles in the Color section, the color of the surface will also change unless you "lock" it first in the Surfaces section by clicking the associated padlock icon. |
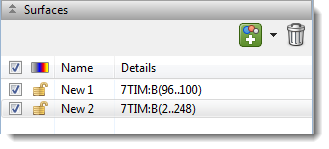
| To change the name or details for an existing surface | Double-click in the Name or Details column and type in the desired text. |
| To view details about an existing surface | Click on the surface in the Name column, then open the Details panel and look in the Structural Properties section. "Surface section in current selection" displays the name of the selection and the surface area in square angstroms. |
| To change the style of an existing surface | Click on the surface to select it, then change the Rendering section settings. |
Need more help with this?
Contact DNASTAR