
SeqBuilder Pro 15.1 and later offers the ability to verify whether or not a clone produced in the laboratory matches the version designed in SeqBuilder Pro. To learn how, watch this brief video or follow the written instructions below:
To verify a clone:
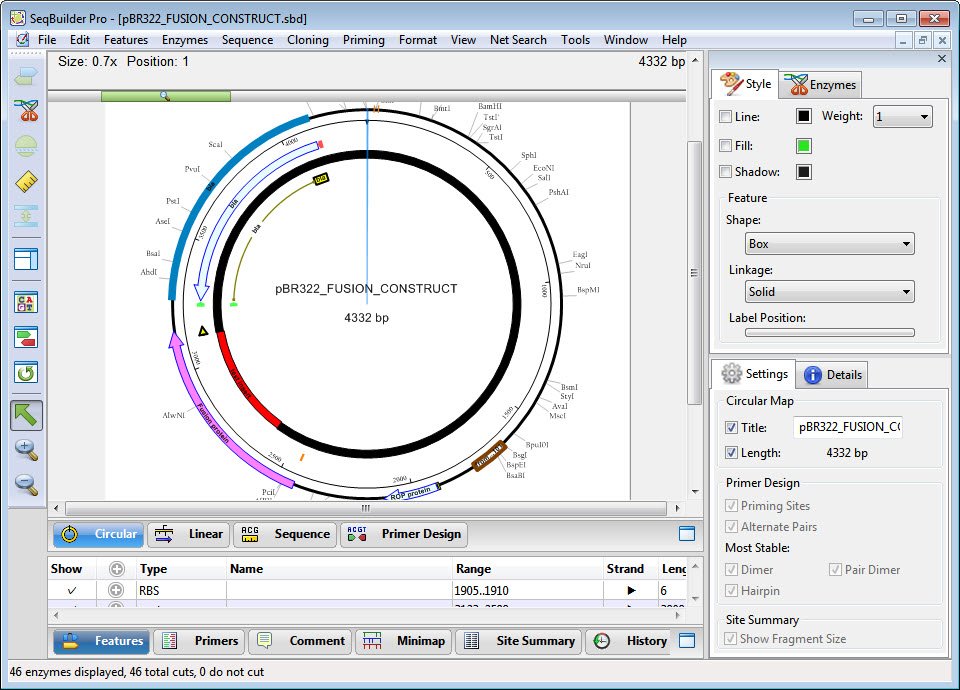
- Use SeqBuilder Pro to design a virtual clone. After completing Step 5: Run the cloning simulation, you will be asked if you wish to verify the clone, discussed in this topic. If you have already created and sequenced the clone in the laboratory, skip to step 5 of the instructions below. Most users, however, will continue to step 2 of the instructions below.
- Save the cloning project.
- Create the clone “in real life” in the laboratory.
- Sequence the lab clone via Sanger sequencing and put the resulting .abi files on the same computer used to design the virtual clone.
- Launch SeqBuilder Pro and use File > Open to open the original cloning project.
- Choose Cloning > Verify Clone. The Project window opens with the Setup tab active.
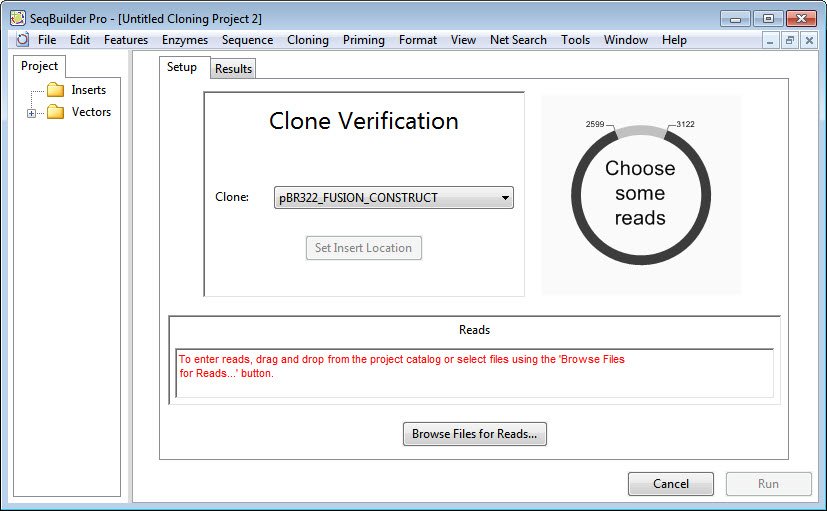
- Use the Clone drop-down menu to specify the clone of interest, if it is not already specified.
- If SeqBuilder Pro cannot locate the cloning insert, the Set Insert Location button will be enabled. Press the button to navigate to the insert.
- Press the Browse files for Reads button at the bottom of the Setup tab. Navigate to the Sanger .abi files obtained from sequencing the laboratory clone.
- Press the Run button.

Behind the scenes, DNASTAR’s SeqMan Pro’s alignment algorithm runs an alignment to verify whether or not the “real life” clone matches the virtual clone designed in SeqBuilder Pro.
Proceed to the topic Interpret results from clone verification.
Need more help with this?
Contact DNASTAR