
In the following tutorial, you’ll locate open reading frames (ORFs), create a feature at the location of a pair of ORFs, and then change the way the feature is displayed.
- If you have not yet download and extracted the tutorial data, click here to download it. Then decompress (unzip) the file archive using the method of your choice.
- Use File > Open to open the demo file Tn5w.sbd.
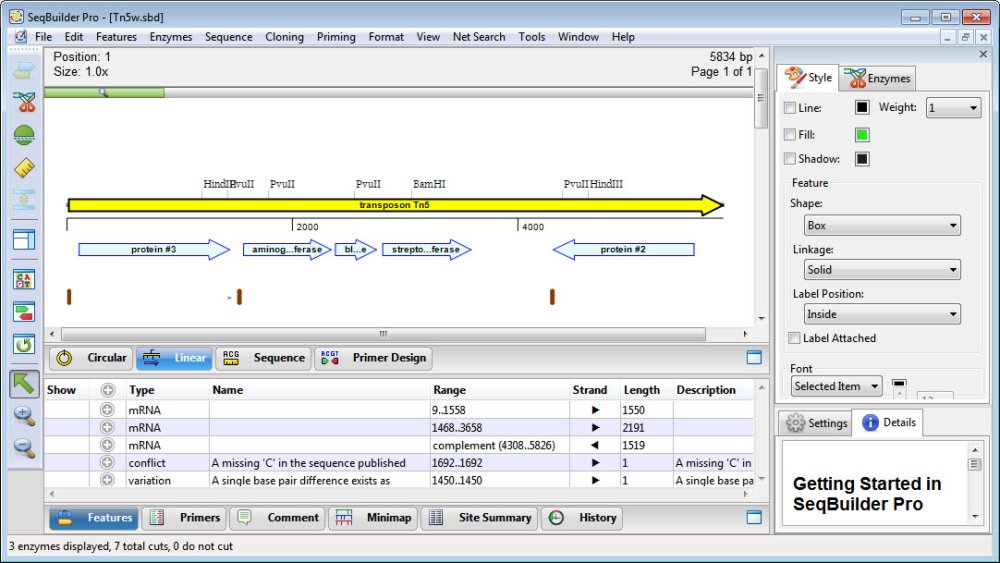
The upper pane of the window displays the Linear view, while the lower pane shows the Features view.
- To locate ORFs, use the Translations and ORFs tool on the left and select ORFs > Top Frame 1.

- Hold down the Shift key and select each of the adjacent ORFs around position 3700.
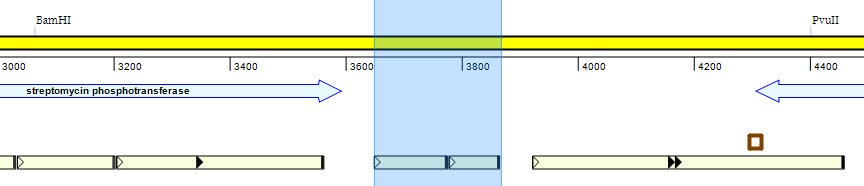
In the header, check that the current Selection is “Forward 3649..3867, length = 219.”
- Select Features > New Feature. A feature appears in the Linear view as an orange-brown box.
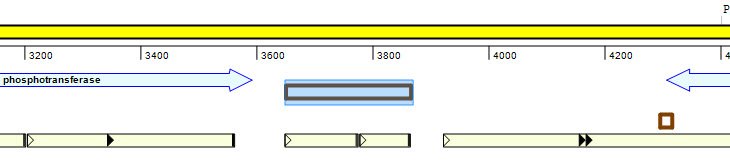
- In the bottom pane of the screen, note the flashing cursor to the right of the word /note. Type ORFs of interest and press Enter/Return; this notation now appears as the label for the feature in the Linear view.

- To make this the permanent label for the feature, right-click on /note and choose Use As Feature Label.
- Near the top-right of the SeqBuilder Pro window, click on the Style tab to make the Style panel active. In the Style panel:
- Click the orange-brown box to the right of Line and pick any shade of purple from the color chooser. Press OK.
- Change the Line Weight to 2.
- Add a shadow by checking the box next to Shadow.
- Use the Shape drop-down menu to select Filled Arrow.
- (optional) If desired, move the green zoom slider (
![]() ) to the right to zoom in on the feature.
) to the right to zoom in on the feature.
 ) to the right to zoom in on the feature.
The feature now appears as below.

Need more help with this?
Contact DNASTAR