
The Project window is a single- or multi-tabbed window that launches in the following situations:
- Choosing File > New Project
The window opens with an unpopulated folder named New Folder in the Project tab.
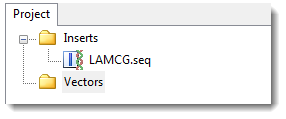
- Choosing File > New Cloning Project
The window opens with two unpopulated folders named Inserts and Vectors in the Project tab.
- Choosing one of many Cloning menu commands
The window opens with two unpopulated folders named Inserts and Vectors in the Project tab. The Clone and Summary tabs are visible on the right.
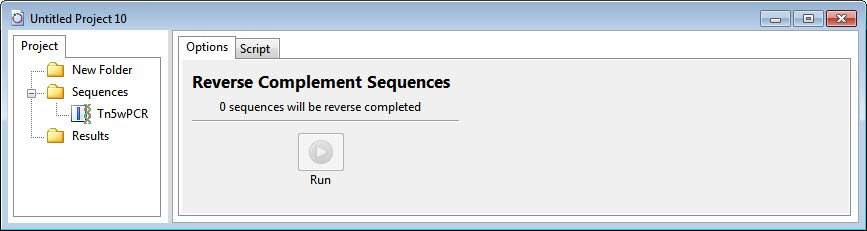
- Making any selection from the Tools menu (available in version 15.1 and later)
The window opens with three folders named New Folder, Sequences and Results in the Project tab. The Options and Script tabs are visible on the right.
- Saving and reopening a project that utilized the Project window.
Each Project window tab is described below. Note that only 1-3 tabs will be visible in a given workflow.
Project tab:
| Task | How to… |
|---|---|
| To display/hide the contents of each folder | Click the plus/minus signs on the left. |
| To add a file to a folder | Select the folder, then right-click on it and choose Import |
| To rename a sequence or folder | Select the sequence or folder, then right-click on it and choose Rename. |
| To export a sequence | Select the sequence, then right-click on it and choose Export |
| To open a file in the Document window | Double-click on any sequence. Linear sequences open in the Linear view, while circular sequences open in the Circular view. |
Clone tab:
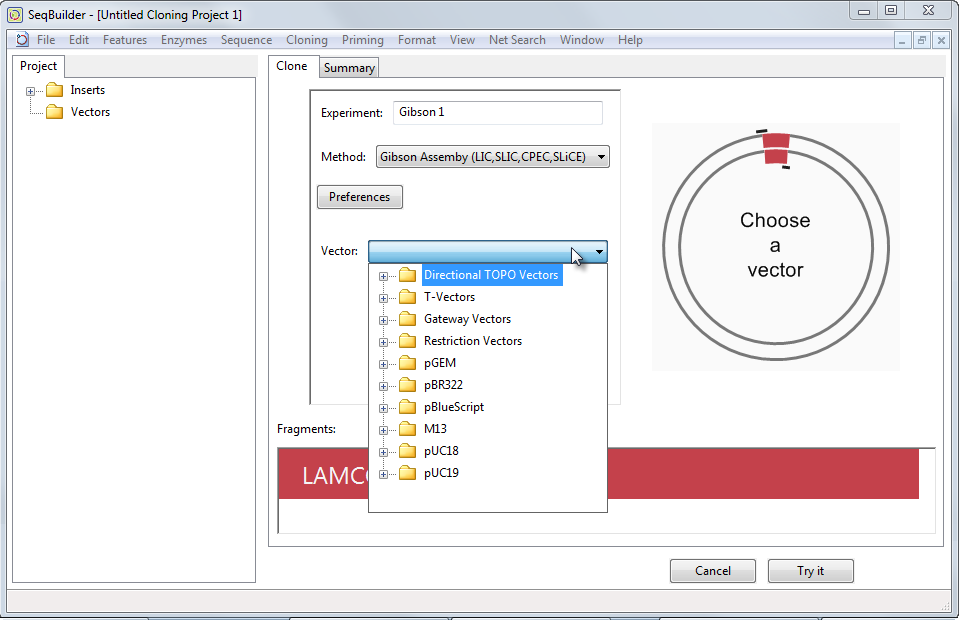
When designing a virtual clone, this tab prompts you to select the cloning method, choose a vector; digest or linearize the vector (if needed); and begin the cloning simulation.
Summary tab:
When designing a virtual clone, this tab displays the Cloning Summary, which can be reviewed prior to completing the simulation. The Cloning Summary provides details about the components of the cloning simulation, including fragment inserts, primers, and the steps needed to prepare the vector and amplify inserts. It also displays the reading frame around all fragment junctions graphically, allowing you to verify whether promoters and genes are in synchrony.
Options tab:
When batch editing sequences, this tab lets you select options to use. For instance, when translating a group of sequences, you can choose which genetic code to use.
Script tab:
When batch editing sequences, this tab lets you see the script (“program”) being used in the procedure.
Need more help with this?
Contact DNASTAR