
If you are following a Combine/Reanalyze Existing Assemblies workflow, you must input at least two assemblies into the Input Assemblies screen before proceeding to the next wizard screen.
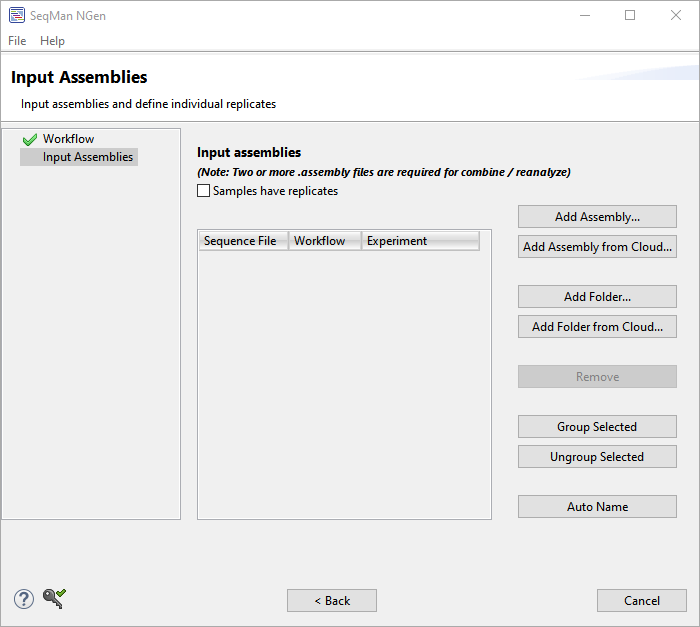
- Add at least two assemblies to the list. All assemblies must have been created using the same reference sequence.
- To add a single assembly, use the Add Assembly or Add Assembly from Cloud buttons.
- To add all assemblies from a folder, use the Add Folder or Add Folder from Cloud buttons.
- To remove an assembly from the list, select it and click Remove.
- To add a single assembly, use the Add Assembly or Add Assembly from Cloud buttons.
- If your project involves replicate samples, check the box next to Samples have replicates.
If you specified that your samples have replicates:
You will see an Experiment column on the right of the table. Before proceeding, each blank Experiment cell must be assigned a name. All rows with identical Experiment names will be treated as a group.
- To assign experiment names manually, click on each individual cell and type in a name.
- To assign experiment names automatically based on their file names minus the file extensions, select one or more rows using click, Ctrl+click, Cmd+click or Shift+click and then press the Auto Name button.
- To group and name experiments, select one or more rows and press the Group Selected button. A popup will appear prompting you to type in a name for the selected file(s). Any names assigned to the row before using Group Selected will be overwritten.
- To remove experiments from a group, select one or more rows and press the Ungroup Selected button. In the selected rows, the Experiment column will return to its original (blank) state.
After entering Experiment names, click Next to proceed to the Set Up Experiments screen.
If you did not specify that your samples have replicates:
You will see an Replicate column on the right of the table. Before proceeding, each blank Replicate cell must be assigned a name. Data files that share identical names in this column will be treated as replicates.
To assign replicate names manually, click on each individual cell and type in a name.- To assign replicate names automatically based on their file names minus the file extensions, select one or more rows using click, Ctrl+click, Cmd+click or Shift+click and then press the Auto Name button.
- To group and name replicates, select one or more rows and press the Create Replicate button. A popup will appear prompting you to type in a name for the selected replicates. Any names assigned to the row before using Create Replicate will be overwritten.
- To remove items from a replicate group, select one or more rows and press the Undo Replicate button. In the selected rows, the Replicate column will return to its original (blank) state.
After entering Replicate names, click Next to proceed to the Set Up Replicate Sets screen.
Need more help with this?
Contact DNASTAR