Note: This topic is not applicable to BAM-based projects.
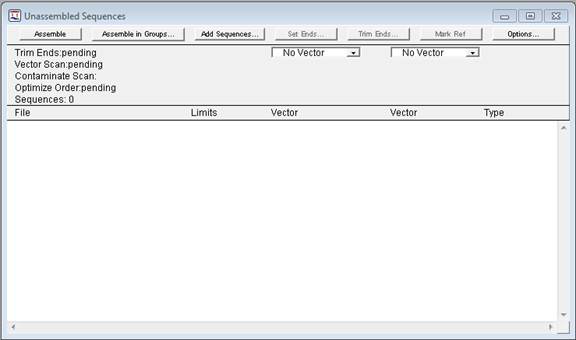
The Unassembled Sequences window allows you to add the sequences for SeqMan Pro to assemble, as well as set up assembly options, such as end trimming and scanning for vector.
The Unassembled Sequences window opens automatically when you launch SeqMan Pro. To access it later, select Sequence > Add and then click Done.
Note: Any sequences that were not included in your assembly will remain in the Unassembled Sequences Window and will be saved within your SeqMan Pro project file.
The following buttons are available across the top of the Unassembled Sequences window:
•Assemble – Once all of your sequences have been added, and the desired parameters have been set, click this button for SeqMan Pro to begin your assembly.
•Assemble in Groups – Once all of your sequences have been added, and the desired parameters have been set, click this button to define a grouping for SeqMan Pro to use when assembling your sequences.
•Add Sequences - Click this button to add sequences to your project for SeqMan Pro to assemble.
•Set Ends - Click this button to access the Set Ends dialog, which allows you to specify that only a selected portion of a particular sequence be used.
•Trim Ends – Click this button to specify whether sequence ends should be trimmed automatically based on quality scores or by fixed end points.
•Mark Ref/Unmark Ref – Click this button to mark/unmark the selected sequence as a reference.
Note: After assembly, you can mark or unmark a sequence as the Reference by right-clicking on the sequence name in the lower part of the Project Summary window and choosing Mark/Unmark Reference Sequence.
•Options – Click this button to access the Preassembly and Assembly Options dialog.

•Use the Vector dropdown lists if you want SeqMan Pro to scan for vector.