
To install Lasergene as a standalone product:
- Log in to your DNASTAR account and go to the My Licenses page. Press the appropriate button (Lasergene for Windows, Lasergene for Mac OS X) to download the standalone installer. Leave this page open, as you will need the product key in the next step.

- Run the installer, following the instructions on each screen. If prompted to authorize, choose Standalone and enter your 17- or 36-character product key, available on the My Licenses page.
To install Lasergene on a network:
Network installation involves two stages: installing the license server on host computer, and installing Lasergene on the client computers. Installing a Lasergene network for the first time or upgrading from an older version both take just a few simple steps.
Part A: License server installation:
On the computer designated to run the Lasergene license server:
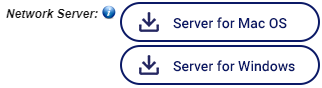
- Log in to your DNASTAR account and go to the My Licenses page. In the Installers column, download the license server by clicking the Network Server button corresponding to the operating system for the license server machine (Server for Mac OS, Server for Windows). Leave this page open, as you will need the product key in the next step.
- Run the installer, following the instructions on each screen. If the server machine uses a firewall, follow the instructions in Handle a firewall on the license server machine. After the installation finishes, you will be asked to enter a product key for authorization. The key is available on the My Licenses page.
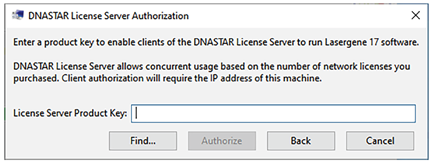
Note: If authorization seems to finish but the popup above is still open, locate the following popup—which may be hidden beneath other windows—and click OK.

- Once authorized, a new LasergeneClient’x’ folder (where ‘x’ is the version number) will be placed on your server’s desktop. This folder contains:
- A file named IP Address [x.x.x.x].txt – Make a note of this IP address as it will be needed to activate Lasergene on the client computers.
- Several *.lshost files – Needed for advanced installations.
- An HTML file – Instructions for client installation.
- A file named IP Address [x.x.x.x].txt – Make a note of this IP address as it will be needed to activate Lasergene on the client computers.
Part B: Client installation:
On each of the client machines that will be running Lasergene:
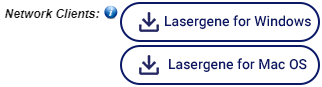
- Log in to your DNASTAR account and go to the My Licenses page. Press the appropriate button to download the client installer (Lasergene for Windows, Lasergene for Mac OS X).
- Place the downloaded installer into the LasergeneClient’x’ folder (see above: Part A, step 3). This folder contains the files LG‘x’.lshost, NG‘x’.lshost, AS‘x’.lshost. Then copy the entire folder to the client machine.
If you are using MacOS 10.14 or earlier, the folder can be placed anywhere, such as the client desktop. If you are using MacOS 10.15 and later the LasergeneClient’x’ directory should be placed at the top level of the user directory or the shared user directory, i.e. /Users/USERNAME/LasergeneClient or /Users/Shared/LasergeneClient.
- On each client computer on which you wish to install Lasergene, launch the installer from within the LasergeneClient’x’ folder. This automatically causes the local access point to be directed to the correct license server computer. Follow the instructions in the installation wizard.
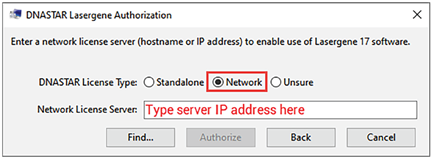
- When prompted, choose Network, and type in the IP address for the license server machine (see above: Part A, step 3).
For in-depth information on standalone and network/client installation, see Detailed guide to installation. For detailed information on network maintenance and troubleshooting, see Network license server administration.
Need more help with this?
Contact DNASTAR