
The license server machine can be either a Macintosh or Windows computer and can serve any combination of Macintosh and Window client machines up to your license limit. Choose a machine that will always be turned on, accessible from your network, and which has a static IP address. Administrator privileges are required to perform license server installation.
This section explains in detail how to install and authorize the DNASTAR network license server software for on a Windows computer. If your server is a Macintosh computer, follow these instructions instead. If you will be performing a standalone installation rather than a network one, proceed to this topic instead.
To install the License server on a Windows computer:
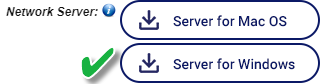
- Log in to your DNASTAR account and go to the My Account page. Click the Network Server button Server for Windows to download the installer.
- Double-click on the DNASTAR License Server Win Installer executable (*.exe) file to initiate installation.
- In the Welcome dialog, read the instructions, and then click Next.
- In the License Agreement dialog, read the agreement and choose I accept the agreement if you accept (required for installation). Press Next.
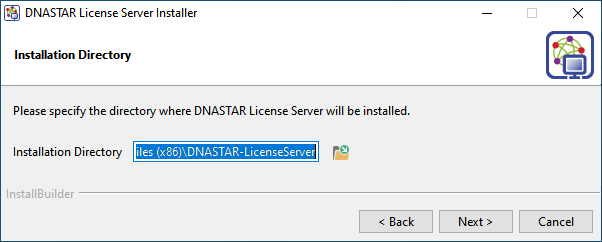
- In the Installation Directory dialog, click Next to install in the default location (C:\Program Files (x86)\DNASTAR-LicenseServer). Otherwise, you may click the browse (folder) icon to install in a custom location. If you are upgrading from a previous Lasergene Network license server, the new version must be installed in the same directory as the previous version. Once the new version of the license server is installed, you will still be able to run previous network client versions during your client upgrade process. After choosing a location, click Continue. Then click Next.
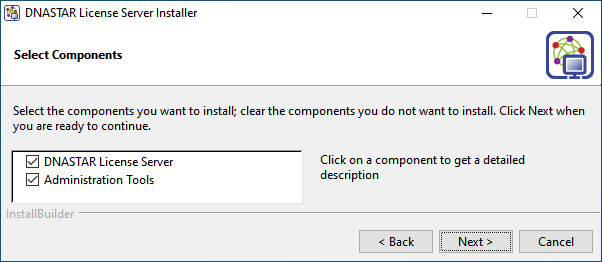
- In the Select Components dialog, you can highlight a component to display information about it in the area to the right. Leave both Components boxes checked and click Next.
- In the Important Notes dialog, read the information and press Next.
- In the Ready to Install dialog, click Next to initiate installation.
- If a license for the current version of the License Server is not detected, the License Server Authorization dialog will open.
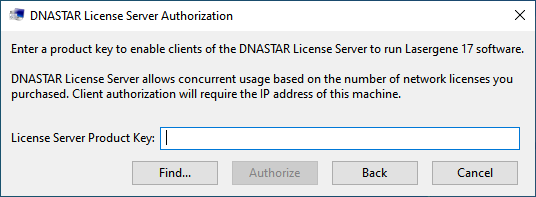
Enter your alphanumeric product key into the License field, and then click Authorize. Your license key is shown in the My Account page of the DNASTAR website.
- A progress bar will be displayed. When you receive a message that authorization was successful, click OK.
After authorizing the software, the following events will occur:
- A new folder named LasergeneClient‘x’ (where ‘x’ is the version number) will appear on the desktop. The detected IP Address of the server computer, required for network client installation, can be found in this folder as a file named IP Address [x.x.x.x].txt.
- A browser window entitled Installing Lasergene Software on Client Computers will open. This page provides information and links for installing the DNASTAR Lasergene network client. The page can be re-opened later from the LasergeneClient‘x’ directory by double-clicking on Lasergene Installation.html.
Having issues with this procedure? Check out these troubleshooting topics:
Otherwise, proceed to Standalone and network client installation for Windows or Macintosh.
Need more help with this?
Contact DNASTAR