
If you create a templated assembly in SeqMan NGen, the .assembly package output contains the reference sequence(s) as well as feature information. By contrast, BAM files (the output for assemblies with Geneious, CLC Workbench and others) do not have either type of information. This means that when you add BAM files to a GenVision Pro session, you will always need to upload one or more reference sequences. The reference can be a genome template package downloaded from DNASTAR, or another reference of your choice. If you wish to upload features and your reference sequence files do not contain those, you will also need to upload a .gff file containing features.
In the instructions below, note that Step 3 requires you to make a choice based on the type of reference files you will be using. Each choice causes a different version of the dialog to appear, and each version is described separately in that step.
To add BAM files to the GenVision Pro session:
- Do any of the following:
- Drag & drop one or more .bam files from your computer’s file explorer onto an open GenVision Pro session.
- From the New tab on the Welcome screen, choose Add BAM alignments to new session.
- Press the Add BAM alignments to session tool (
![]() ).
).
- Choose File > Add BAM Alignments.
- Drag & drop one or more .bam files from your computer’s file explorer onto an open GenVision Pro session.
- A file chooser is displayed. Navigate to and select the desired .bam alignment(s), then press Open.
- Use the References drop-down menu to choose either Each reference is in a separate file or All references are in one file.
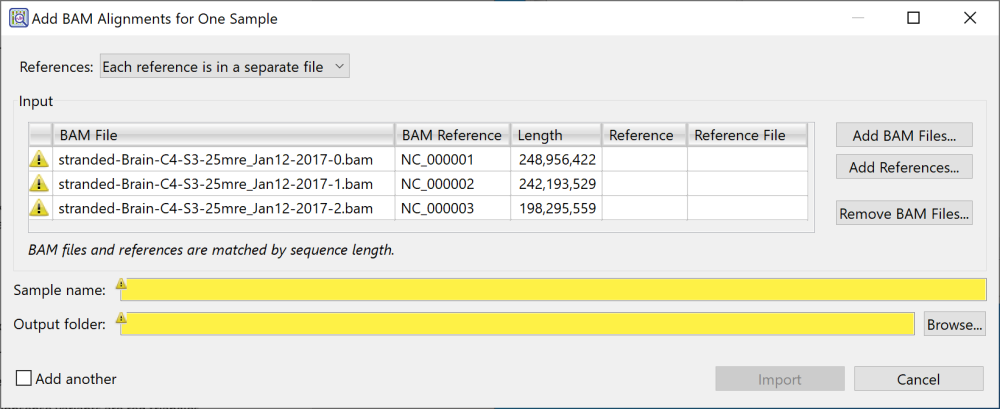
- If your references are a set of .gbk or .fasta (or .fas) files, often one file per chromosome, choose Each reference is in a separate file. The dialog appears as in the image below.
![]()
Start by importing references in the upper part of the dialog. Note that yellow “warning” triangles are shown to the left of any sequence that does not yet have an associated reference sequence. At first, all sequences will have the warning triangles. Start by importing references until all the warnings have disappeared. GenVision Pro automatically assigns references to their corresponding samples. If GenVision Pro detects that the references are from the wrong organism or otherwise incorrect, it will not assign them to any samples.
- To add one or more references sequences, press Add References. Once you have added references, this button changes to Replace References.
- To add additional .bam files, press Add BAM Files.
- To remove a file that is already in the Input table, select the sample row and press Remove BAM Files.
- To add one or more references sequences, press Add References. Once you have added references, this button changes to Replace References.
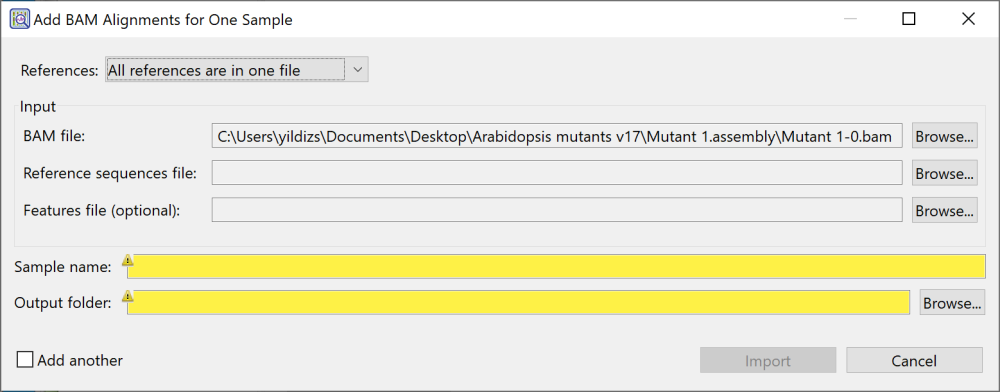
- If your reference consists of one .fasta (or .fas) file with a separate .gff file containing features, choose All references are in one file. The dialog appears as in the image below.
![]()
- To add a reference sequence, use the Browse button to the right of Reference sequences file.
- To add an optional feature file in .gff format, use the Browse button to the right of Features file (optional).
- To switch to a different BAM file, use the Browse button to the right of BAM file.
- To add a reference sequence, use the Browse button to the right of Reference sequences file.
- If your references are a set of .gbk or .fasta (or .fas) files, often one file per chromosome, choose Each reference is in a separate file. The dialog appears as in the image below.
- Name the sample by typing text into the Sample name field. This field is highlighted in yellow until you input a name.
- When you import BAM files, GenVision Pro reprocesses them using the same XNG assembly engine used by SeqMan NGen. In essence, GenVision Pro does a “mini” assembly. Therefore, you need to specify a folder for this assembly output. Choose the Output folder using the Browse button on the right. The Output folder field is highlighted in yellow until you choose a location.
- Press Import to import the samples listed in the Input section above. If you wish to add another sample file in .bam format, check the box next to Add another before pressing Import. The additional sample must use the same reference sequence(s) that you already imported in the earlier steps above.
After pressing Import, the BAM file import will show up as an “in progress” job in the Jobs panel. Small jobs will take only a few minutes, while samples using the human genome as the reference can take about an hour to process. While the job is in progress, you will receive a warning if you attempt to close GenVision Pro. However, you can work on additional GenVision Pro sessions while your job is processing. You can also track the progress of the job in the Console view.
Need more help with this?
Contact DNASTAR