
Automated batch cloning lets you automatically clone large numbers of fragments into the same vector. Most of the steps involved are similar or identical to those in regular automated virtual cloning, but the cloning window has been optimized for batch cloning.
Preliminary steps:
These optional steps take about 2-20 minutes each, but can provide benefits for many future cloning workflows.
Main cloning workflow::
The main cloning workflow takes only about two minutes from start to finish. However, for purposes of explanation, it has been divided into nine steps.
- Choose Cloning > Batch Clone or Tools > Batch Clone to open a specialized version of the Cloning window.

- Load the inserts into the Inserts folder by clicking and then right-clicking on the folder and choosing Import. Select the file and click Open.
 !
!
- Use the Method drop-down to choose between Ligation Independent Single Insert, Gateway Single Insert or PCR Directed Restriction Insert.
- The Batch Prefix box is populated with a prefix that will be used to begin each clone’s name. This prefix relates to the current cloning method. If you would like to override this, type a substitute prefix into the box.
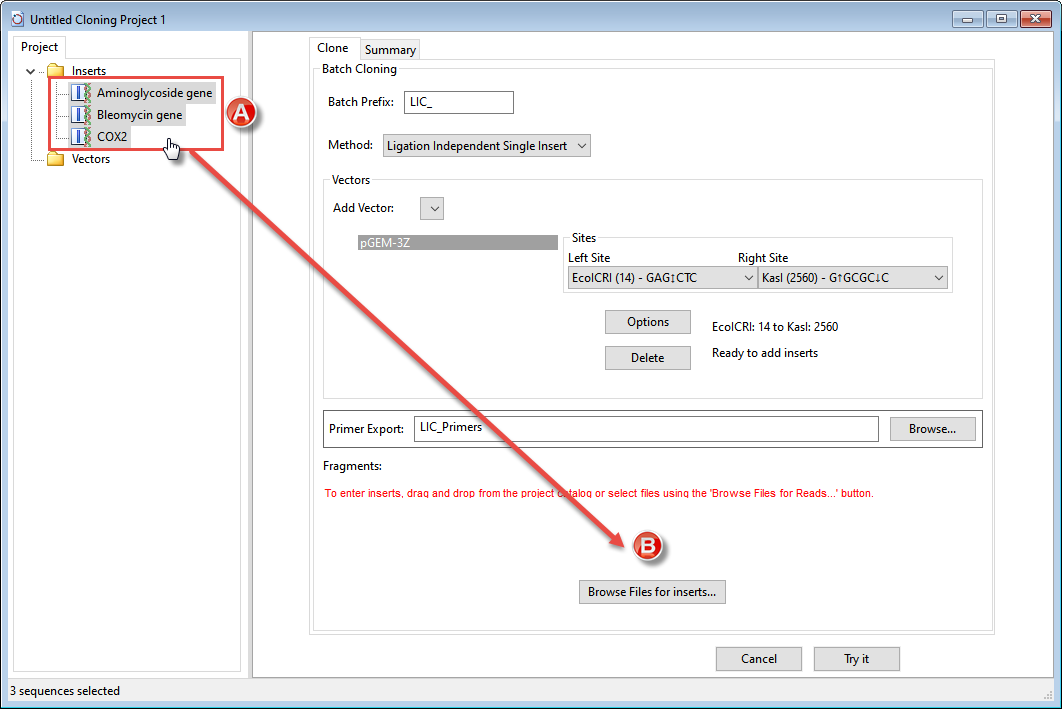
- If you are doing Ligation (LIC) or PCR cloning, choose one or more vectors from the Add Vector drop-down. If you are doing Gateway cloning, you will be prompted to choose both a Donor Vector and a Destination Vector.
Within the Add Vector drop-down menu, expand or hide folder contents by pressing the +/- buttons.

To add multiple vectors, use the same drop-down menu to choose each additional vector. To delete a vector once it appears in the list below the drop-down menu, right-click on its name and choose Delete.
- If you are doing LIC or PCR cloning, specify the cloning region using either of the following methods:
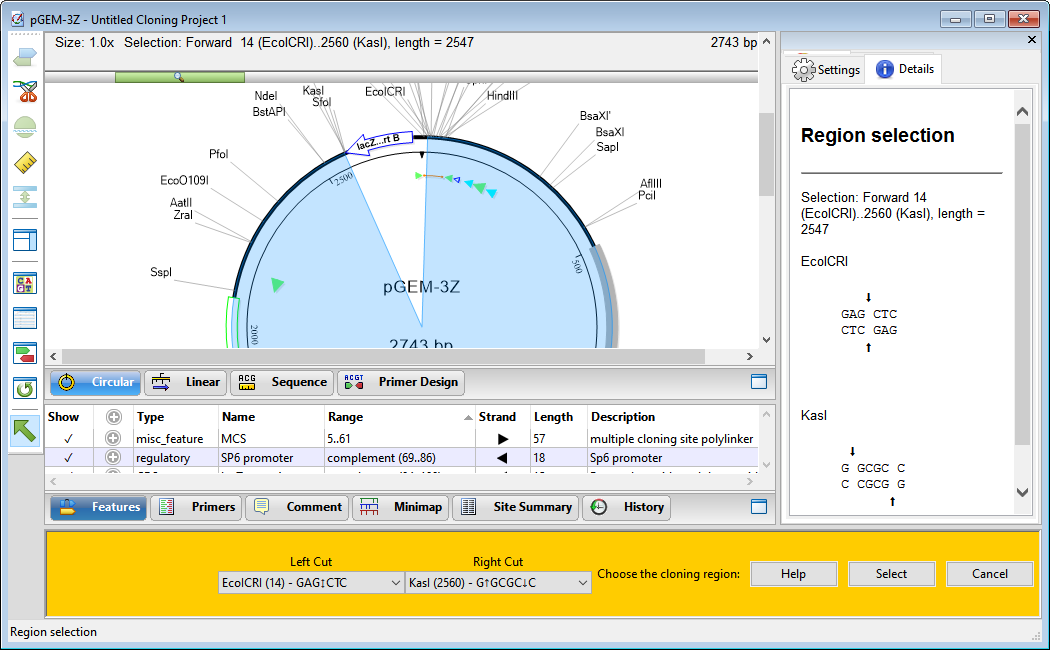
- Choose enzymes from the Left Site and Right Site drop-down menus. If you change your mind, simply make a different selection from either/both menus.
![]()
- Press the Options button to open the Circular view and choose restriction sites from the two drop-down menus there. After specifying the cloning region, press Select.
![]()
- Choose enzymes from the Left Site and Right Site drop-down menus. If you change your mind, simply make a different selection from either/both menus.

To remove selections and return the cloning region menus to their default states, press Delete.
- Specify inserts by pressing the Browse files for inserts button or by dragging the insert(s) from the Inserts folder (A) on the left of the window and dropping them into the area near the button (B).
![]()
To remove an insert from the list, right-click on it and choose Delete.
- Press Try It. A summary appears.
![]()
If you wish to change something before running the cloning simulation, press Change. Otherwise, proceed to the next step.

- Press Make it. A window pops up prompting you to save the primers file. Choose between FASTA (.fas), primer catalog (.pri) and text (.txt) formats, then click Save. This primer file can be used for ordering primers. An example of a .fas file opened in a text editor appears below.
![]()

********************************************************************
Results are saved in the Project window. Folder contents are described below.

- Inserts – Contains any files added to the folder prior to cloning.
- Vectors – Contains any vectors added to the folder prior to cloning, as well as the vector(s) actually used in the cloning simulation.
- Inserts – The inserts resulting from the cloning simulation. These are named with the suffix -insert to differentiate them from the original files.
- Clones – The clones. Each name begins with the selected Batch Prefix and has the suffix Clone.
- Primers – Each clone and insert combination has its own set of primers. This file, which begins with the selected Batch Prefix, has all primers concatenated together. Double-click on the file to open it in SeqBuilder Pro’s main window and view primer details in the Primers tab.
![]()

Need more help with this?
Contact DNASTAR