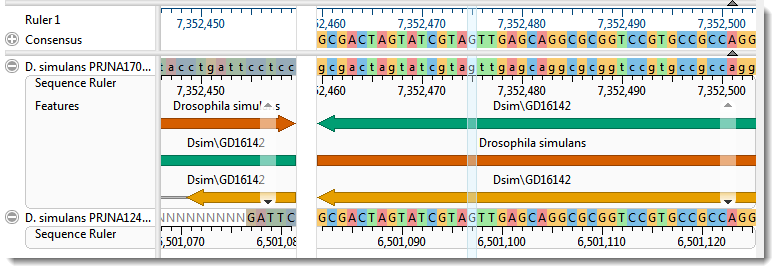
In this part of the tutorial, you will map a single selected feature from the source sequence to the target sequence. In order to choose the appropriate mapping command, you will need to know where the source and target sequences appear in relation to one another in the list on the left of the views. If you followed the steps in Part A, the source sequence should be at the top of the two-member list.
- To verify this, open the tracks panels by clicking both gray plus signs (
) in the Overview or Sequences view. If you followed the steps in Part A, the upper sequence should contain features and the lower sequence should not.

- In the Overview, double-click on any block to make it the focus block.
In the Sequences view, note that the letters (or bars, if zoomed out) with highly-colored backgrounds denote the active block selected in the previous step. Letters or bars with dull-colored backgrounds indicate an adjacent, non-focus block. Colored arrows represent features.

- Keeping within the active block section, right-click on any feature and choose Map Selected Feature to Bottom Sequence. Observe that the feature is copied to the corresponding location in the lower sequence. Repeat this with other features, if desired. If you don’t see any features, go back to Step 2 and double-click on a different block to make it active.
- To prepare for the next part of the tutorial, remove the feature(s) you just added to the target sequence by right-clicking on the lower sequence name and choosing Features > Remove Features From Selected Sequence. When prompted, click Yes. Observe that the target sequence has returned to its original state.
Proceed to Part C: Map all features.
Need more help with this?
Contact DNASTAR


 ) in the