
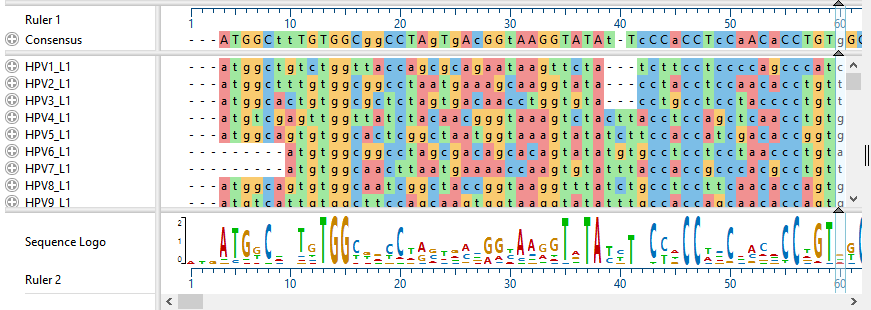
In Part B, you looked at the Sequences view while learning the function of the "viewport." You will now explore the Sequences view in more depth. The Sequences view displays entered sequences and aligned sequences. Sequences selected in this view are simultaneously selected in all other MegAlign Pro views.
- In the Sequences view, observe that the names of each sequence originated from the accession numbers that were embedded in the input files.
![]()
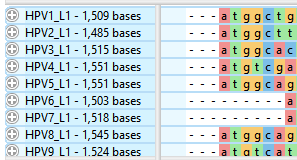
To also add the sequence length as part of the name:
- Use Ctrl+A or Cmd+A to select all of the sequence names.
- Right-click on the highlighted group and select Rename Sequences with Fields, or choose Edit > Rename Sequences with Fields from the main menu.
- Select Sequence length from the left pane and click the right arrow to add it.
![]()
- Click OK.
- Use Ctrl+A or Cmd+A to select all of the sequence names.

The sequence labels now reflect their lengths in base pairs:
- Remove the current selection by double-clicking on any white space, e.g., white space in the header or footer area of the Overview or Sequences view.
- Use File > Save to save the project as HPV project.msa.
- In the Sequence view, click on any plus icon (
![]() ) to reveal a details track containing a gap-aware ruler. These sequences do not contain annotations, but if they did, the annotations would also be visible.
) to reveal a details track containing a gap-aware ruler. These sequences do not contain annotations, but if they did, the annotations would also be visible.
 ) to reveal a details track containing a gap-aware ruler. These sequences do not contain annotations, but if they did, the annotations would also be visible.
- The appearance of the sequences can be changed using settings in the Style panel’s Sequence and Multiple Alignment sections located to the right of the views. Experiment with the items in this area to see how they affect the look of the Sequences view. Some items must first be enabled by checking the associated checkbox.

When you have finished trying out different color schemes and fonts, we recommend changing them back to the original settings (shown in the image above) for ease of following the remainder of this tutorial.
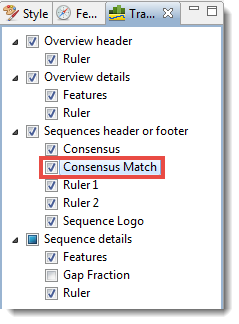
- Imagine that you want to see the Consensus Match track, but it is not included in the default display. To display the track, click the Tracks tab in the upper right of MegAlign Pro (or select View > Tracks > Tracks) and check the box next to Consensus Match.
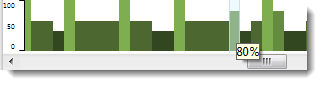
- Locate the Consensus Match histogram in the footer of the Sequences view. Hover over a bar to see a pop-up showing the percent of sequences that match the consensus at that residue.
- Hide the footer by clicking on the small gray arrow near its top right corner (
![]() ). The Sequence Logo, Ruler and Consensus Match will disappear. Click on the arrow again to redisplay the footer. (Note: For future reference, you can close other panes the same way, including the footer and the main parts of the Sequence view and Overviews).
). The Sequence Logo, Ruler and Consensus Match will disappear. Click on the arrow again to redisplay the footer. (Note: For future reference, you can close other panes the same way, including the footer and the main parts of the Sequence view and Overviews).
 ). The Sequence Logo, Ruler and Consensus Match will disappear. Click on the arrow again to redisplay the footer. (Note: For future reference, you can close other panes the same way, including the footer and the main parts of the Sequence view and Overviews).
Proceed to Part D: Change metrics and rendering in the Distance view.
Need more help with this?
Contact DNASTAR