
To create a single multi-sequence file composed of exported sequences:
- Choose Tools > Export Sequences into Single File. The Project window opens with the Project and Options tabs active.
- In the Project tab, place the sequences you wish to export into the Sequences folder. To add sequences to a folder, select the folder, then right-click it and choose Import. Select the desired sequence files, and press Open. Use Shift+click or Ctrl/Cmd+click to select two or more sequences.
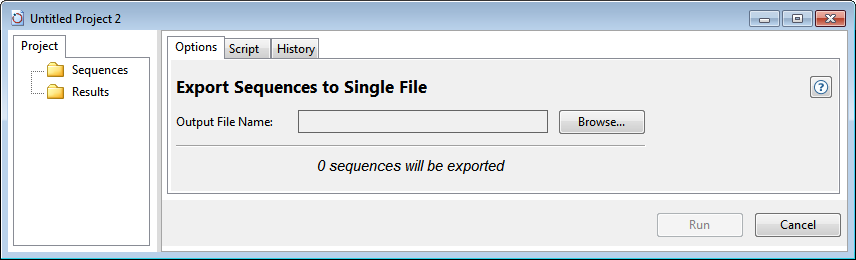
In the Options tab on the right, the number of sequences selected on the left appears in the message: “‘n’ sequences will be exported.’
- In the Options tab, click the Browse button. In the ensuing dialog, navigate to the location for the output file. Type in a name and select an extension (.fas or .gbk), then click Save. The Output File Name text box now contains the name and file path where the output file will be saved.
- Press the Run button.
The new multi-sequence file appears in the Project tab’s Results folder with the name chosen above. The new file is represented by a folder icon and its contained sequences are named automatically according to a qualifier (e.g., /protein_id, /locus, or /accession).
- (optional) If you wish to see the script that was used to run this process, press the Script tab.
- (optional) If you want to see the history of the run, including the location of the output file(s), press the History tab.
Need more help with this?
Contact DNASTAR