
The tutorial Try it! – Create and modify primers for TA cloning demonstrated how to select and modify a primer pair. This tutorial shows how to extract the PCR insert and create a virtual TA clone.
- If you have not already done so, follow the tutorial Try it! – Create and modify primers for TA cloning. If the project is still open from following the tutorial, double-click on the white space in the Primers view to remove the current selection.If you closed the project since following that tutorial, use File > Open to open the file saved at the end of that tutorial.
- Choose Priming > Create Insert by PCR to extract the sequence of the PCR product and simulate its amplification with Taq polymerase including the addition of 3’ A overhangs to each end.
A Project window opens with a new Taq amplified insert inside the Inserts folder.

- Select Cloning > TA Cloning.
- Drag the amplified insert from the Inserts folder of the Project tab and drop it on the Fragment area of the Clone tab.
- Look in the Vector drop-down menu and note that the set has been filtered to include only linear vectors, as required for TA (and TOPO) cloning. Linear vectors have the icon
![]() . Select pBAD-TOPO from the Vector drop-down menu.
. Select pBAD-TOPO from the Vector drop-down menu.
 . Select pBAD-
- Click Try It and then Make It.
In the Project tab on the left, note that new forward and reverse orientation clones now appear in the Project tab in the TA Clone 1 folder.

The forward and reverse orientation clone files open automatically in new Document windows. By default, each top pane shows the simulated clone in the Circular view. Notice that the primers and PCR product appear as features. These features can also be seen in the Features view, as well as all graphical views.

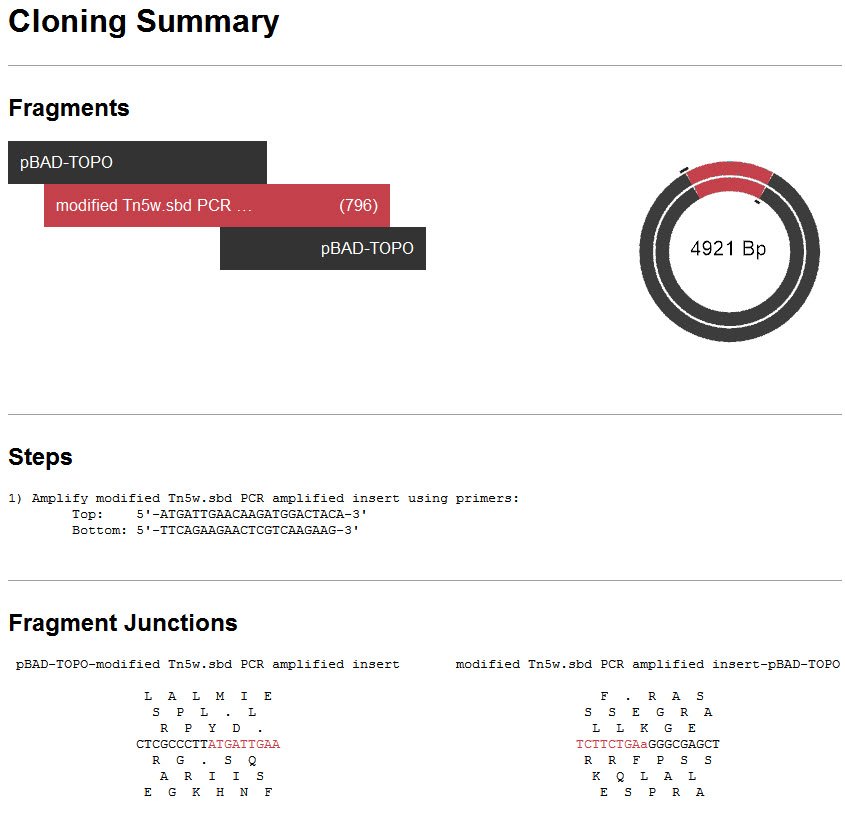
- Click on the History tab at the bottom of the SeqBuilder Pro window to see the Cloning Summary, including the steps needed to create this clone in your lab.
![]()
Need more help with this?
Contact DNASTAR