
The Labels section is located in the Explorer panel and is used to create a visual label for selections in the Structure view.
To open the Labels section, click the expand bar entitled Labels or use View > Explorer > Labels. Note that the Labels section is only functional if the project contains a protein structure rather than a sequence.
Columns in the Labels section:
| Column Name | Description |
|---|---|
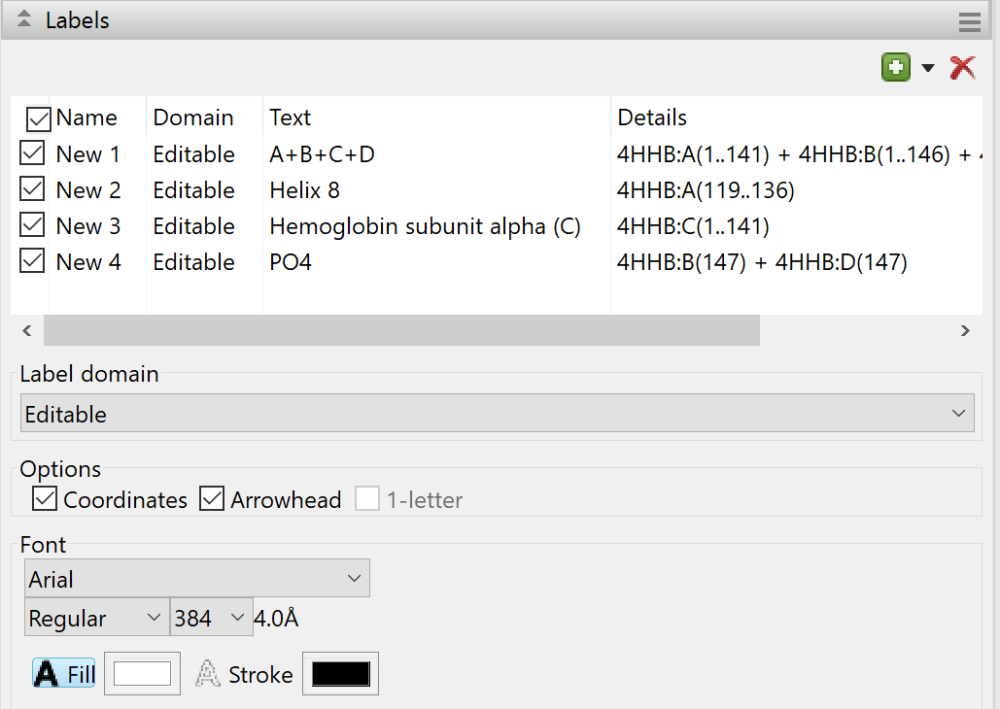
| Name | By default, the Name field is automatically assigned based on the order in which labels were created. The default names are New 1, New 2, New 3, etc. If the Domain is Editable, then the Name column can be manually edited as described in the table below. |
| Domain | Displays the current Label domain for the label. By default, the domain is Editable unless otherwise specified. See the table below for more information. |
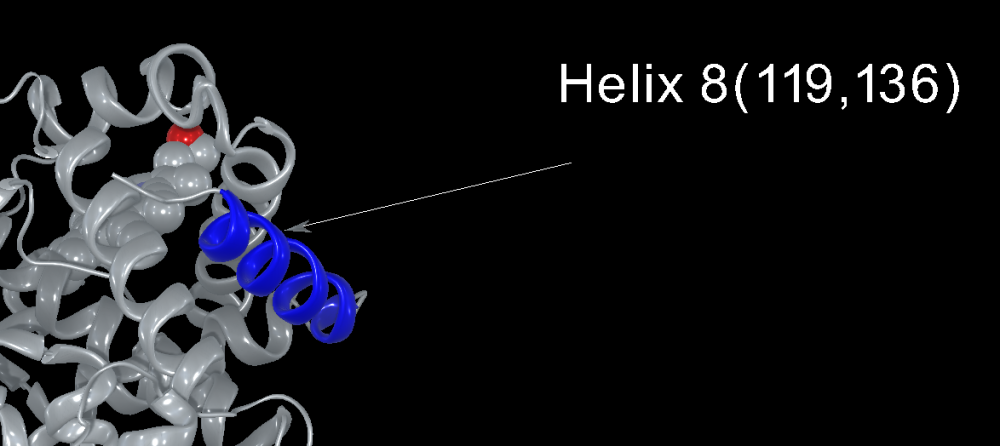
| Text | Initially displays descriptive text pertaining to the labeled selection. For example, if you made a selection by clicking on the Name or Details columns of the Molecules section, the text from those columns is used. If you selected a structural feature in the Sequence view, the text will consist of the feature type followed by its number along the sequence, e.g., Helix 8 for the eighth helix to occur on the sequence. If the Domain is Editable, then the Text column can be manually edited as described in the table below. |
| Details | Displays the structure, chain, and residues in the labeled selection, separated by colons, e.g., 4HHB:A(119..136). |
Tasks related to the Labels section:
| Task | How To |
|---|---|
| Specify the item you wish to label | Do any of the following:
|
| Create a label for the currently selected item | Do either of the following:
|
| Specify a label domain (type) for the selected label | The label domain (see types, above) affects which options are enabled in the Options section. Unless otherwise specified, the label domain is set to Editable by default. Specific domains (Atoms, Residues, Chains) can be assigned in any of three ways:
|
| Choose what information is displayed as part of the label | Check boxes in the Options section to chose components how the label is displayed. Available options depend on which type of Label domain is currently selected (see row above).
|
| Change the name or text for an existing label | If the Domain is Editable, then the Name and Text fields can be edited. To do this, double-click on a cell in the Name or Text column and type in the desired text. |
| Specify the font, style, and text size for all labels | Font specifications apply to all labels, not to individually selected labels. To customize the font, use the three drop-down menus under Font. As you change these options, the display changes to reflect the number of angstroms (Å) represented by the label. To change the text outline (“stroke”) and fill colors, click the boxes to the right of Fill and Stroke and choose the desired color from the color picker. By default, labels are shown in Arial Regular 256 pt with white fill and black stroke. |
| Toggle between displaying/hiding an existing label | Check or uncheck the box at the left of the row. |
| Toggle between displaying/hiding all labels | Check or uncheck the box on the left of Name in the header. |
| Delete a selected label | Select the label you want to remove and use the Delete selected labels tool ( |
Need more help with this?
Contact DNASTAR